No edit summary Tag: Visual edit |
No edit summary |
||
| Line 22: | Line 22: | ||
==Plot== |
==Plot== |
||
{{Template:Quote|There's no turning back now. But it will all be worth it.|The female researcher in the intro.}} |
{{Template:Quote|There's no turning back now. But it will all be worth it.|The female researcher in the intro.}} |
||
| − | An Umbrella researcher in the facility moves backwards to a large capsule before being shot by a female colleague. Meanwhile, [[Yoko Suzuki]] leads |
+ | An Umbrella researcher in the facility moves backwards to a large capsule before being shot by a female colleague. Meanwhile, [[Yoko Suzuki]] leads [[George Hamilton]] and [[Alyssa Ashcroft]] to the facility's escape tunnel at the bottom of the lab. |
As they come to, the gate to the facility is closed. The same researcher opens the gate, unknowing of the survivors. As they cross the passage, Yoko is nearly shot by the researcher, who reveals herself to be her long time colleague, Monica. As they exchange words, Monica steals Yoko's ID card and flees to escape, all while Yoko sees her carrying a large attaché case. |
As they come to, the gate to the facility is closed. The same researcher opens the gate, unknowing of the survivors. As they cross the passage, Yoko is nearly shot by the researcher, who reveals herself to be her long time colleague, Monica. As they exchange words, Monica steals Yoko's ID card and flees to escape, all while Yoko sees her carrying a large attaché case. |
||
| Line 28: | Line 28: | ||
{{Template:Quote|Have a nice life. What's left of it...|Monica, when running away.}} |
{{Template:Quote|Have a nice life. What's left of it...|Monica, when running away.}} |
||
| − | + | They follow Monica shortly after. When entering a ventilation shaft, the survivors decide to split up. As Yoko and Alyssa decide to investigate the B7F, George investigates the B6F. |
|
| − | + | Yoko and Alyssa manage to create a potent chemical that can be used to kill weeds. They discover a giant plant that is blocking the stairway to the upper floors. Using the chemical, they manage to kill the plant. |
|
{{Template:Quote|It won't move! Why?! I don't believe this! Something else has to be fixed to get out of here.|Monica, while trying to make the turn table functional.}} |
{{Template:Quote|It won't move! Why?! I don't believe this! Something else has to be fixed to get out of here.|Monica, while trying to make the turn table functional.}} |
||
| − | + | They regroup, and as they are about to go to the upper floors, Monica is atacked by an unknown creature while trying to use a turn table to escape. |
|
| − | Moving up to the |
+ | Moving up to the B4F, they discover the same turn table, but the entire floor is frozen and the lift won't move. Re-acquiring her ID card that was on the floor nearby, Yoko goes back to a previous corridor and uses it to open a shutter. As she was a previous reseacher in the facility, she is granted free entry into the following room, discovering what happened to the researcher in the beginning; He has turned into a zombie. |
| − | In the same room, |
+ | In the same room, they find a blowtorch. Going back to a [[B4F Low Temperature Laboratory|previous room]], they use the blowtorch to melt the ice covering a lever, switching it on. This not only unfreezes the floor and the lift, but also a series of Hunters that were encountered as frozen statues earlier. |
| − | As they rush back to the lift, |
+ | As they rush back to the lift, Yoko uses a key dropped by Monica into a nearby panel to activate the lift. As the survivors defend themselves from the forthcoming Hunters, Monica reappears with the capsule in her attaché case broken; She collapses on the ground without saying anything. |
| − | As the lift arises with |
+ | As the lift arises with Yoko, Alyssa and George on the locomotive, Monica rises from the ground and her chest bursts open with a G-Larvae, presumably injected into herself when she was atacked before, killing her instantly. The larvae makes its way up to the marshalling yard, unknown to them. |
| − | As the lift reaches the top, the |
+ | As the lift reaches the top, the Larvae opens a hole with its incredible force and grows to a 12' tall complete "G". Again, the survivors must fight, and they make use of the locomotive to hit the crature. When the creature is finally dead, they board the locomotive once more and operate it, moving on to a power plant. |
| + | {{Template:Quote|This is a warning for us for peering into the structure of DNA and the living-we-know everything. And so, the world starts to collapse from within...|Ending (George's perspective)}} |
||
| ⚫ | |||
| + | |||
| + | {{Template:Quote|We managed to beat whatever that thing was, but is it over? I may have just unleashed something terrifying.|Ending (Alyssa's perspective)}} |
||
| + | |||
| ⚫ | |||
==Walkthrough== |
==Walkthrough== |
||
{{Incomplete|section}} |
{{Incomplete|section}} |
||
| − | ===Event |
+ | ==='''The Event Checklist'''=== |
{| class="article-table article-table-selected" style="width: 500px;" border="0" cellpadding="1" cellspacing="1" |
{| class="article-table article-table-selected" style="width: 500px;" border="0" cellpadding="1" cellspacing="1" |
||
|- |
|- |
||
| Line 161: | Line 165: | ||
==Notes== |
==Notes== |
||
| − | * There are many doors throughout the level that cannot be accessed due to being broken from "large scratch |
+ | * There are many doors throughout the level that cannot be accessed due to being broken from "large scratch-like indents". However, later on during the events of ''[[Resident Evil 2]]'', these doors are perfectly accessible. |
*This is one of the three scenarios where a player must die in an occasion to gain Checklist points. In order to receive those points, they must not be present when the turn table goes up as the countdown reaches to warning and the cutscene starts. If a player is not present in the room, a special scene will happen where the player finds the train gone and a hunter will appear and kill him/her instantly. |
*This is one of the three scenarios where a player must die in an occasion to gain Checklist points. In order to receive those points, they must not be present when the turn table goes up as the countdown reaches to warning and the cutscene starts. If a player is not present in the room, a special scene will happen where the player finds the train gone and a hunter will appear and kill him/her instantly. |
||
| − | *This will be the only scenario (or time in the series) which a player can take a request to save a survivor, giving him a First aid spray as he says that he doesn't want to die. If the player gives to him, as a gratitude, he will give a fully loaded Shotgun on Easy |
+ | *This will be the only scenario (or time in the series) which a player can take a request to save a survivor, giving him a First aid spray as he says that he doesn't want to die. If the player gives to him, as a gratitude, he will give a fully loaded Shotgun on Easy, Normal and Hard, or five Grey Chemical Bottles on Very Hard. |
| − | *This is also the first scenario in the Outbreak series that a character that is scripted to die when not chosen. In this case, it is Yoko, as she will be found dead and reanimate as a zombie in a room, depending on the difficulty. |
+ | *This is also the first scenario in the Outbreak series that has a character that is scripted to die when not chosen. In this case, it is Yoko, as she will be found dead and reanimate as a zombie in a room, depending on the difficulty. |
===Gallery=== |
===Gallery=== |
||
Revision as of 22:08, 19 March 2014
"
We escaped the zombies and found our way into a frozen underground facility. What truths lie beyond the cries of pain in the distance? " |
Below Freezing Point, known as "Below Zero" (零下 Reika) in the original script, is the second scenario in Resident Evil Outbreak. It takes place in the Raccoon City Underground Laboratory.
Plot
"There's no turning back now. But it will all be worth it." — The female researcher in the intro. |
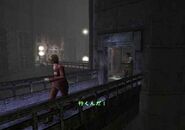
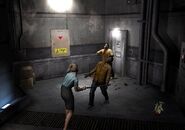
An Umbrella researcher in the facility moves backwards to a large capsule before being shot by a female colleague. Meanwhile, Yoko Suzuki leads George Hamilton and Alyssa Ashcroft to the facility's escape tunnel at the bottom of the lab.
As they come to, the gate to the facility is closed. The same researcher opens the gate, unknowing of the survivors. As they cross the passage, Yoko is nearly shot by the researcher, who reveals herself to be her long time colleague, Monica. As they exchange words, Monica steals Yoko's ID card and flees to escape, all while Yoko sees her carrying a large attaché case.
"Have a nice life. What's left of it..." — Monica, when running away. |
They follow Monica shortly after. When entering a ventilation shaft, the survivors decide to split up. As Yoko and Alyssa decide to investigate the B7F, George investigates the B6F.
Yoko and Alyssa manage to create a potent chemical that can be used to kill weeds. They discover a giant plant that is blocking the stairway to the upper floors. Using the chemical, they manage to kill the plant.
"It won't move! Why?! I don't believe this! Something else has to be fixed to get out of here." — Monica, while trying to make the turn table functional. |
They regroup, and as they are about to go to the upper floors, Monica is atacked by an unknown creature while trying to use a turn table to escape.
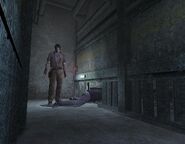
Moving up to the B4F, they discover the same turn table, but the entire floor is frozen and the lift won't move. Re-acquiring her ID card that was on the floor nearby, Yoko goes back to a previous corridor and uses it to open a shutter. As she was a previous reseacher in the facility, she is granted free entry into the following room, discovering what happened to the researcher in the beginning; He has turned into a zombie.
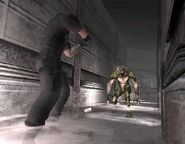
In the same room, they find a blowtorch. Going back to a previous room, they use the blowtorch to melt the ice covering a lever, switching it on. This not only unfreezes the floor and the lift, but also a series of Hunters that were encountered as frozen statues earlier.
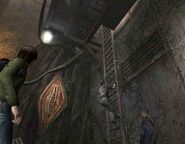
As they rush back to the lift, Yoko uses a key dropped by Monica into a nearby panel to activate the lift. As the survivors defend themselves from the forthcoming Hunters, Monica reappears with the capsule in her attaché case broken; She collapses on the ground without saying anything.
As the lift arises with Yoko, Alyssa and George on the locomotive, Monica rises from the ground and her chest bursts open with a G-Larvae, presumably injected into herself when she was atacked before, killing her instantly. The larvae makes its way up to the marshalling yard, unknown to them.
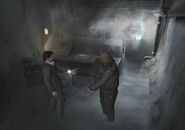
As the lift reaches the top, the Larvae opens a hole with its incredible force and grows to a 12' tall complete "G". Again, the survivors must fight, and they make use of the locomotive to hit the crature. When the creature is finally dead, they board the locomotive once more and operate it, moving on to a power plant.
"This is a warning for us for peering into the structure of DNA and the living-we-know everything. And so, the world starts to collapse from within..." — Ending (George's perspective) |
"We managed to beat whatever that thing was, but is it over? I may have just unleashed something terrifying." — Ending (Alyssa's perspective) |
"How unreliable are the memories. I remember my acquantiance but I cannot remember myself. And I feel something will change dramatically when I know everything." — Ending (Yoko's perspective) |
Walkthrough
The Event Checklist
| Event | Points |
|---|---|
|
Unlocked locker with lockpick. |
30 |
|
Thawed frozen wrench. |
20 |
|
Used wrench to open panel. |
20 |
|
Used valve handle to open door. |
10 |
|
Watched "Used V-Jolt in B7F." |
20 |
|
Watched "Used V-Jolt in B6F." |
40 |
|
Watched "Monica Runs Off." |
10 |
|
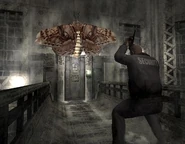
Watched "Giant Moth Attacks." |
40 |
|
Watched "Comp. Room Desertion." |
50 |
|
Unlocked comp. room w/card key. |
20 |
| Unlocked shutter with card key. | 20 |
|
Watched "Used Blowtorch." |
20 |
|
Used key to activate turn table. |
20 |
|
Watched "Missed Turntable." |
40 |
|
Watched "Turn Table Goes Up." |
20 |
|
Moved locomotive. |
30 |
|
Watched "Defeated Mutated G." |
20 |
|
Received item from researcher 1. |
20 |
|
Got item from staffer 2 (Yoko). |
50 |
|
Obtained map. |
20 |
| Obtained "Top-Secret Memo." | 30 |
| Obtained "Researcher's Will." | 30 |
| Obtained "Staff Memo." | 20 |
| Obtained "Interoffice Memo." | 20 |
| Obtained "Laboratory Memo." | 30 |
|
Obtained "Monthly Passcode." |
20 |
|
Obtained "Custodian's Diary." |
30 |
Notes
- There are many doors throughout the level that cannot be accessed due to being broken from "large scratch-like indents". However, later on during the events of Resident Evil 2, these doors are perfectly accessible.
- This is one of the three scenarios where a player must die in an occasion to gain Checklist points. In order to receive those points, they must not be present when the turn table goes up as the countdown reaches to warning and the cutscene starts. If a player is not present in the room, a special scene will happen where the player finds the train gone and a hunter will appear and kill him/her instantly.
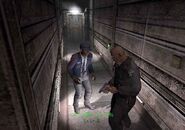
- This will be the only scenario (or time in the series) which a player can take a request to save a survivor, giving him a First aid spray as he says that he doesn't want to die. If the player gives to him, as a gratitude, he will give a fully loaded Shotgun on Easy, Normal and Hard, or five Grey Chemical Bottles on Very Hard.
- This is also the first scenario in the Outbreak series that has a character that is scripted to die when not chosen. In this case, it is Yoko, as she will be found dead and reanimate as a zombie in a room, depending on the difficulty.
Gallery
Sources
| ||||||||||||||||||||

