m (clean up, replaced: PTAS → ₧) |
|||
| (20 intermediate revisions by 9 users not shown) | |||
| Line 1: | Line 1: | ||
| − | {{ |
+ | {{Infobox room |
|name = Castle parlour |
|name = Castle parlour |
||
| − | |jp name = 城内サロン |
+ | |jp name = 城内サロン |
| + | |image =[[File:Game 2014-07-24 19-52-14-105.jpg|250px]] |
||
| − | |image = |
||
| + | |files = [[Castellan Memo]] |
||
| − | |items = |
||
| + | |items =[[Gallery Key]]<br> |
||
| − | Red herb<br/> |
||
| − | + | [[Goat Ornament]]<br> |
|
| + | [[Handgun Ammo (Resident Evil 4)|Handgun Ammo (10) x2]]<br> |
||
| − | Yellow herb<br/> |
||
| − | + | [[Shotgun Ammo|Shotgun Ammo (5)]]<br> |
|
| + | [[Rifle Ammo|Rifle Ammo (5)]]<br> |
||
| − | Spinel<br/> |
||
| − | + | [[Green Herb| Green Herb x2]]<br> |
|
| − | + | [[Red Herb]]<br> |
|
| − | + | [[Yellow Herb]]<br> |
|
| − | + | [[Spinel]]<br> |
|
| + | [[Velvet Blue|Velvet Blue x2]]<br> |
||
| − | 1,000₧ chests (x4) |
||
| + | Gold Chest (1000) x4 |
||
| − | |enemies = [[ |
+ | |enemies = [[Cultists]]<br> |
| + | Red Robed Cultists<br> |
||
| + | [[Ramon Salazar|Salazar]] (Cutscene)<br> |
||
| + | [[Verdugo]] (Cutscene) |
||
|allies = |
|allies = |
||
| − | |area = Castle |
+ | |area = [[Castle]] |
|links = [[Temple]]<br/> |
|links = [[Temple]]<br/> |
||
| − | [[Western castle wall]] |
+ | [[Castle/Western castle wall|Western castle wall]] |
| + | |game = ''[[Resident Evil 4]]''}} |
||
| ⚫ | |||
| − | The '''castle parlour'''<ref>Hamamura (ed.), ''kaitaishinsho'', p.250</ref> was the location of another trap for Leon |
+ | The '''castle parlour'''<ref>Hamamura (ed.), ''kaitaishinsho'', p.250</ref> was the location of another trap for Leon. |
==Description== |
==Description== |
||
| + | The parlour consists of two main rooms, both containing large numbers of [[Cultists]]. In the first a machine gun turret may attack [[Leon S. Kennedy|Leon]], while in the second room large waves of enemies will attack. the [[Goat Ornament]] can be found here. |
||
| + | |||
==Guide== |
==Guide== |
||
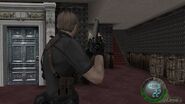
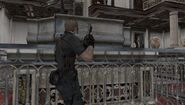
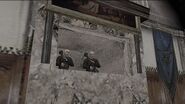
| + | A set of two small rooms is where the area begins, with a [[Red Herb]] and a file. Once progressing through the door a short cutscene will play showing the enemies in the room, including a red-robed Cultist with a key around his neck. This enemy cannot be killed until later, no matter the player's actions. The two Cultists with crossbows will immediately fire on Leon. If the barrel behind the left archer is shot, it will kill multiple enemies on the balcony. From there the second archer can be sniped and Leon may progress. Keep in mind there are two enemies on the ground floor as well. |
||
| + | |||
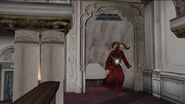
| + | Once through the next door there are some items as well as a masked enemy at the top of the stairs, who can be easily defeated. Leon can then run around the edge of the balcony and drop down to the group of enemies. Another cutscene will play of the main Cultist opening and running through the closed door, then any remaining enemies will attack. |
||
| + | |||
| + | It is now possible to kill the red-robed cultist. If the player is good with a rifle then he can be picked off before getting too far, but if not he can be chased after and shot. A shield enemy will spawn through the door before the stairs. If the main cultist is not killed before Leon reaches the bottom of the stairs, he will appear in the center of the room manning a machine gun turret. Leon will have to take cover to avoid taking large amounts of damage from the gun, and pick him off with a rifle. Once killed he will drop the [[Gallery Key]]. |
||
| + | |||
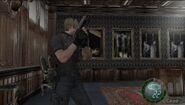
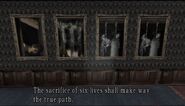
| + | The next room contains a puzzle consisting of four paintings of executions. The goal is to flip the dual-sided paintings so that the sum of all executions is six. Solving the puzzle opens the door beyond. |
||
| + | |||
| + | Continuing through the door starts a cutscene with [[Ramon Salazar|Salazar]] leading to Leon's surrounding by scythe-wielding Cultists, also locking the entrance and exit doors. Running to the right and entering the door makes dealing with these enemies easier. After they are killed archers will spawn in the four corners of the second floor, each of which can be replaced after being killed once. The painting above the fireplace in the area will open up to reveal two Cultists holding rocket launchers, who will both fire at Leon before the painting moves back into place. |
||
| + | |||
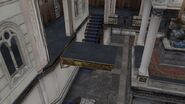
| + | A button by the exit door must be pressed first, causing a platform to rise in the middle of the room as well as the painting for the rocket launcher wielding Cultists. From here the player turns right and enters a hallway, at the end of which there is a vase. Breaking the vase reveals the second button that must be hit, extending a bridge to the chest in the middle of the room as well spawning a group of mask-wearing cultists. These can be avoided if Leon hurries through the next steps. |
||
| + | |||
| + | When exiting the hall two rocket enemies will be aiming at Leon. These can either be killed from one shot of any gun quickly, or avoided by turning back and allowing their rockets to hit the closed door. The Goat Ornament must be obtained from the chest, unlocking the doors and allowing Leon to progress. |
||
| + | |||
| + | ==Puzzle Content== |
||
| + | ===Non-optional puzzle=== |
||
| + | In the final part of the gallery, the player must flip portraits of people getting executed around until the sum of all the executions visible is six. Each of the four switches will rotate a different set of portraits, requiring precise ordering to be able to be solved. The only game-given hint about the puzzle is only what will allow progression, the sum being six. Other than this, the player must figure it out by themselves. Once solved, the wall will slide to the side, allowing access to the door, and thus, the next area. |
||
| + | |||
| + | SOLUTION SPOILER: Rotate one, then two, then three, then four all in a row, and this will solve the puzzle. |
||
| + | |||
| + | ==Examines== |
||
| + | {| class="article-table" border="0" cellpadding="1" cellspacing="1" style="width: 660px;" |
||
| + | |- |
||
| + | ! scope="col" |Location |
||
| + | ! scope="col" |Action |
||
| + | ! scope="col" |Localization |
||
| + | ! scope="col" |Original script |
||
| + | |- |
||
| + | |The gallery door while it is locked |
||
| + | |OPEN |
||
| + | |(locked door sound) It's locked. |
||
| + | | |
||
| + | |- |
||
| + | |The control panel near the paintings. |
||
| + | |OPERATE |
||
| + | |The sacrifice of six lives shall make way the true path.<br />Press which switch?<br>(choice: 1/ 2/ 3/ 4/ Ok/ Quit) |
||
| + | | |
||
| + | |- |
||
| + | |The switch under the vase while the security system is active |
||
| + | |CHECK |
||
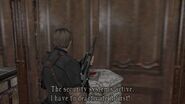
| + | |The security system's active. I have to deactivate it first! |
||
| + | | |
||
| + | |- |
||
| + | |The red button by the exit |
||
| + | |CHECK |
||
| + | |It looks like a security system of some sort. Deactivate? (choice: Yes / No) |
||
| + | | |
||
| + | |- |
||
| + | |The switch under the vase while the security is deactive |
||
| + | |CHECK |
||
| + | |There's a switch. Press it? (choice: Yes / No) |
||
| + | | |
||
| ⚫ | |||
| + | |||
| + | == Further Notes == |
||
| + | * This area becomes inaccessible once Ashley is rescued. |
||
| + | |||
| + | ==Gallery== |
||
| + | <gallery> |
||
| + | BradyGamesCastleParlour.png|[[Resident Evil 4 Official Strategy Guide]] |
||
| + | game 2014-07-24 19-51-33-805.jpg |
||
| + | game 2014-07-24 19-52-20-863.jpg|Zealots |
||
| + | game 2014-07-24 19-52-35-603.jpg |
||
| + | game 2014-07-24 19-53-43-866.jpg |
||
| + | game 2014-07-24 19-53-45-808.jpg |
||
| + | game 2014-07-24 19-54-09-293.jpg|"It's locked" |
||
| + | game 2014-07-24 19-55-06-891.jpg |
||
| + | game 2014-07-24 19-55-25-733.jpg |
||
| + | game 2014-07-24 19-56-27-215.jpg |
||
| + | game 2014-07-24 19-56-32-790.jpg |
||
| + | game 2014-07-24 19-57-43-220.jpg |
||
| + | game 2014-07-24 19-58-26-452.jpg |
||
| + | game 2014-07-24 19-58-31-151.jpg|"The sacrifice of six here shall make way the true path" |
||
| + | game 2014-07-24 19-59-00-314.jpg |
||
| + | game 2014-07-24 19-59-02-486.jpg|A door is revealed |
||
| + | game 2014-07-24 19-59-10-348.jpg |
||
| + | game 2014-07-24 19-59-13-315.jpg|Ramon Salazar |
||
| + | game 2014-07-24 19-59-53-378.jpg |
||
| + | game 2014-07-24 20-00-01-043.jpg |
||
| + | game 2014-07-24 20-00-34-030.jpg|More Los iluminados monks |
||
| + | game 2014-07-24 20-00-53-873.jpg|2 monks with and 2 RPG |
||
| + | game 2014-07-24 20-02-22-333.jpg |
||
| + | game 2014-07-24 20-02-40-577.jpg|"The security system's active. I have to deactivate it first!" |
||
| + | game 2014-07-24 20-02-57-391.jpg|"It looks like a security system of some sort." |
||
| + | game 2014-07-24 20-03-02-188.jpg |
||
| + | game 2014-07-24 20-03-47-296.jpg |
||
| + | game 2014-07-24 20-04-28-694.jpg |
||
| + | game 2014-07-24 20-04-33-593.jpg |
||
| + | game 2014-07-24 20-04-53-568.jpg|"Goat Ornament" |
||
| + | game 2014-07-24 20-04-56-652.jpg |
||
| + | </gallery> |
||
==Bibliography== |
==Bibliography== |
||
*{{Cite book|title=[[biohazard4 kaitaishinsho revised edition]]|publisher= Famitsu|author=|authors=|editor=Koichi Hamamura|page=|pages= |language=Japanese |isbn=4-7577-2638-4|year=2006}} |
*{{Cite book|title=[[biohazard4 kaitaishinsho revised edition]]|publisher= Famitsu|author=|authors=|editor=Koichi Hamamura|page=|pages= |language=Japanese |isbn=4-7577-2638-4|year=2006}} |
||
==Sources== |
==Sources== |
||
| − | <references/> |
+ | <references /> |
[[Category:Castle]] |
[[Category:Castle]] |
||
Revision as of 18:35, 6 June 2019
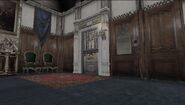
The castle parlour[1] was the location of another trap for Leon.
Description
The parlour consists of two main rooms, both containing large numbers of Cultists. In the first a machine gun turret may attack Leon, while in the second room large waves of enemies will attack. the Goat Ornament can be found here.
Guide
A set of two small rooms is where the area begins, with a Red Herb and a file. Once progressing through the door a short cutscene will play showing the enemies in the room, including a red-robed Cultist with a key around his neck. This enemy cannot be killed until later, no matter the player's actions. The two Cultists with crossbows will immediately fire on Leon. If the barrel behind the left archer is shot, it will kill multiple enemies on the balcony. From there the second archer can be sniped and Leon may progress. Keep in mind there are two enemies on the ground floor as well.
Once through the next door there are some items as well as a masked enemy at the top of the stairs, who can be easily defeated. Leon can then run around the edge of the balcony and drop down to the group of enemies. Another cutscene will play of the main Cultist opening and running through the closed door, then any remaining enemies will attack.
It is now possible to kill the red-robed cultist. If the player is good with a rifle then he can be picked off before getting too far, but if not he can be chased after and shot. A shield enemy will spawn through the door before the stairs. If the main cultist is not killed before Leon reaches the bottom of the stairs, he will appear in the center of the room manning a machine gun turret. Leon will have to take cover to avoid taking large amounts of damage from the gun, and pick him off with a rifle. Once killed he will drop the Gallery Key.
The next room contains a puzzle consisting of four paintings of executions. The goal is to flip the dual-sided paintings so that the sum of all executions is six. Solving the puzzle opens the door beyond.
Continuing through the door starts a cutscene with Salazar leading to Leon's surrounding by scythe-wielding Cultists, also locking the entrance and exit doors. Running to the right and entering the door makes dealing with these enemies easier. After they are killed archers will spawn in the four corners of the second floor, each of which can be replaced after being killed once. The painting above the fireplace in the area will open up to reveal two Cultists holding rocket launchers, who will both fire at Leon before the painting moves back into place.
A button by the exit door must be pressed first, causing a platform to rise in the middle of the room as well as the painting for the rocket launcher wielding Cultists. From here the player turns right and enters a hallway, at the end of which there is a vase. Breaking the vase reveals the second button that must be hit, extending a bridge to the chest in the middle of the room as well spawning a group of mask-wearing cultists. These can be avoided if Leon hurries through the next steps.
When exiting the hall two rocket enemies will be aiming at Leon. These can either be killed from one shot of any gun quickly, or avoided by turning back and allowing their rockets to hit the closed door. The Goat Ornament must be obtained from the chest, unlocking the doors and allowing Leon to progress.
Puzzle Content
Non-optional puzzle
In the final part of the gallery, the player must flip portraits of people getting executed around until the sum of all the executions visible is six. Each of the four switches will rotate a different set of portraits, requiring precise ordering to be able to be solved. The only game-given hint about the puzzle is only what will allow progression, the sum being six. Other than this, the player must figure it out by themselves. Once solved, the wall will slide to the side, allowing access to the door, and thus, the next area.
SOLUTION SPOILER: Rotate one, then two, then three, then four all in a row, and this will solve the puzzle.
Examines
| Location | Action | Localization | Original script |
|---|---|---|---|
| The gallery door while it is locked | OPEN | (locked door sound) It's locked. | |
| The control panel near the paintings. | OPERATE | The sacrifice of six lives shall make way the true path. Press which switch? (choice: 1/ 2/ 3/ 4/ Ok/ Quit) |
|
| The switch under the vase while the security system is active | CHECK | The security system's active. I have to deactivate it first! | |
| The red button by the exit | CHECK | It looks like a security system of some sort. Deactivate? (choice: Yes / No) | |
| The switch under the vase while the security is deactive | CHECK | There's a switch. Press it? (choice: Yes / No) |
Further Notes
- This area becomes inaccessible once Ashley is rescued.
Gallery
Bibliography
- Koichi Hamamura, ed (2006) (in Japanese). biohazard4 kaitaishinsho revised edition. Famitsu. ISBN 4-7577-2638-4.
Sources
- ↑ Hamamura (ed.), kaitaishinsho, p.250


