()
The Raccoon City Underground Laboratory was a large subterranean laboratory located in the outskirts of Raccoon City that was operated by the Umbrella Corporation and administrated by Dr. William Birkin.
This sprawling facility, built primarily for the research and development of the G-virus, could be accessed via an underground cable car system that linked the facility to the sewers beneath the Raccoon City Police Department and the Umbrella Research Center, a private train station on the lowest level, as well as a personal elevator that allowed access to the Research Center's train station above that.
History
The Raccoon City Underground Laboratory was constructed in 1991 following the discovery of the G-Virus within a human test subject. Either due to the small size or aging nature of the Arklay Laboratory, Umbrella CEO Dr. Lord Oswell E. Spencer felt an entirely new facility was necessary for this research.[1][2] Dr. William Birkin, the Arklay Laboratory's chief researcher, was transferred to the laboratory personally to carry out the research.[1]
In the early stages of the Tyrant development, the Proto Tyrant was put in storage in this facility, awaiting final disposal. During the Queen Leech's release of the t-Virus and B.O.W.s around the Arklays, this factory was used by Drs. Albert Wesker and William Birkin as a base for the "reclamation project". S.T.A.R.S. officers Rebecca Chambers and Enrico Marini found themselves inside the Hunter-infested factory underground during their investigation of the Arklays; the former then defeated the newly-escaped Proto Tyrant before leaving. Wesker would later travel through the underground to re-activate power needed for travel to the Umbrella Research Center.
Raccoon City Destruction Incident
In late September, William was severely wounded by a U.S.S. team.[3] When the t-Virus spread, it reached the city from the sewers, after being consumed by rats, who in turn infected the water supply. However, this time, the facility was safer. During the crisis, the experimental Hunter Rs' were released, killing at least ten scientists. One of the researchers managed to alter the temperature controls, freezing the creatures in their tracks.[4]
Not long later, Monica - a researcher, attempted to steal a G-embryo sample. During the exploration of the facility by an ex-researcher, Yoko Suzuki and three other survivors reverted the temperature controls to normal in an attempt to use the turntable. Luckily, they managed to kill the Hunters before escaping.[5]
They then activated the turntable and rode it to the outside world. At the same time, Monica rejected the G-embryo, which she had somehow become host to.[6] The creature followed the survivors up the shaft and attacked them. However, it was defeated and the survivors escaped.
On the early hours of September 30, five survivors arrived at the facility in hopes of escaping via the underground train: Claire Redfield, Leon S. Kennedy, Sherry Birkin, Annette Birkin and Ada Wong.
However, the t-Virus had, since the visit by Yoko, spread throughout the facility further. Claire and Annette worked together to produce "DEVIL," a cure for Annette's daughter Sherry, who had also been impregnated by her father, William. At the same time, Leon and Ada tried activating the train. Ada was injured saving Leon from a T-103 which had been stalking them since the Sewers. Her severe injuries led Leon to think she was dead.
Prior to shooting Claire for supposedly killing her husband, Annette was attacked by a mutated William, who slashed through her body with his talons before escaping. On her way to the train, Claire was attacked by William. She eventually managed to defeat him, seemingly for good, before escaping.
On the escape train, Claire gave the cure to Sherry moments before she succumbed to G, curing her almost instantly. The trio then left Raccoon City as the facility self-destructed as a safety-precaution. However, a second self-destruct sequence was activated on the train after biohazardous tissue was detected - William, having mutated into a enormous blob of organs and teeth. After destroying the once brilliant scientist-turned organic blob, the three escaped the train to the outside world, with William killed in the blast.
Research
Although the facility was primarily constructed for G-Virus research, it was not the only focus of the lab, which also investigated chemicals relating to G-Virus research as well as wholly unrelated B.O.W. research. While Dr. William Birkin engineered the G-Virus, his wife Dr. Annette Birkin led the "DEVIL" project to create a medicine that could restrict the aggressive spread in organisms. Dr. Martin Walcott research team based in the No. 1 R&D room developed a drug that could put G organisms in a comatose state for transportation.[7]
Unrelated to G research, another team, possibly led by Dr. William Birkin,[8] engineered the Hunter R as an improved bio-weapon prototype derived from the Hunter A, which Dr. William Birkin had developed in the 1980s. In the final weeks before the facility's destruction, a team developed Plant 43, based on information retrieved from the Spencer Mansion. An anti-B.O.W. weapon was developed by a team in the No. 2 R&D room called "P-ε".[9]
Architecture

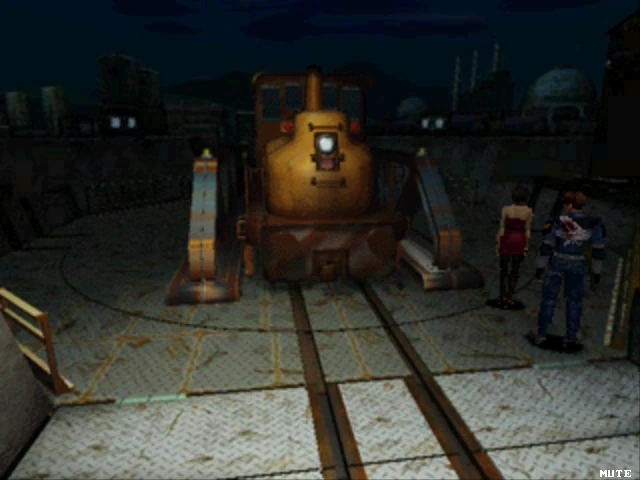
A large elevator in the marshalling yard could transport engines underground.
To keep spies away from the facility, Umbrella constructed the laboratory beneath Raccoon City's northern industrial district with a dummy warehouse serving as the facade. The warehouse complex was itself at the end of a marshalling yard, with one track ending in the middle of the complex on a service elevator capable of carrying an engine full of passengers to and from level B4F. To further allow researchers access to the facility, the warehouse complex also had a station for Umbrella's cable car system, an underground transportation utilising Raccoon City's underground caverns.
In the laboratory proper, levels B1F-B3F were primarily designed to supply the laboratory with energy. Level B1F contained the main power room as well as providing staff with access to a self-destruct mechanism that would set off strategically-placed bombs that would destroy the lab if compromised. Level B2F consisted of the actual machinery for the power room and was normally steam-filled. Level B3F consisted solely of a smelting room and an observation platform above a large, open vat of molten metal.
Levels B4F-B7F housed the complex's actual research labs. Unlike the above floors, which were linked by elevators, these levels had to be reached through ladders. Level B4F was the first of the main laboratory levels, hence the level for the railway elevator. A security office was located against the platform, with another door leading to the main shaft, the centre of the complex where power to the research labs could be turned on and off. This shaft led to two wings - the East Area and West Area. The West Area led to researcher dormitories and a duct for B5F access. The East Area meanwhile consisted of rooms for various research projects: an operating room; low-temperature lab and a culturing room.
Level B5F was the site of the P-12A laboratory where G-Virus research was conducted, with a security office placed close by to keep Dr. Birkin's research safe. The east side of this floor included a storage room with elevator access to level B8F, and was likely where supplies were delivered.
B6F did not have any laboratories, instead being more simple in its design. Its main use was as a second level for the security room, linked to the upper room by a ladder. On the east side was a break room to allow researchers to socialise. Several vending machines and a television were located on this wing to better serve its purpose.
B7F, the final level for the research labs, consisted of chemical storage rooms.
The very bottom level of the facility was B8F. This level was the site of a second platform, with its own train. This area was used for the covert shipment of materials in and out of Raccoon City.
Known staff
- Dr. William Birkin
- Dr. Annette Birkin
- Dr. Frederic Downing
- Dr. Frost
- Dr. Monica
- Walter Ryan
- Rick
- Roy
- Dr. Martin Walcott
Gallery
")
.jpg "Main shaft (4).jpg (60 KB)")
.jpg "Main shaft (2).jpg (122 KB)")
")
")
.jpg "B4F experimentation room (1.5).jpg (83 KB)")
.jpg "B4F experimentation room (3.5).jpg (60 KB)")
")
.jpg "P-4 Laboratory (12).jpg (94 KB)")
")
")
")
")
")
")
Further notes
- This may be one of the most visited locations throughout the Resident Evil series. It appears in Resident Evil Zero; Resident Evil 2; Resident Evil Outbreak and Resident Evil: The Darkside Chronicles, and was reimagined for Resident Evil: Operation Raccoon City.
- The facility's appearance in Resident Evil Zero is very problematic. It was decided very late in the project by then-series writer Noboru Sugimura that the lab should appear as a shout-out to fans of the earlier games. This led to its appearance some eight miles north-west of where Flagship established it to be. Consequently, it can be treated by fans as if it were an unrelated facility.
Sources
- ↑ 1.0 1.1 Wesker's Report II.
- ↑ Resident Evil 5 (2009), file: "History of RESIDENT EVIL".
- ↑ Resident Evil 2 cutscene
- ↑ Researcher's Will (Below Freezing Point)
- ↑ Below Freezing Point gameplay
- ↑ Turn Table Goes Up
- ↑ Resident Evil Outbreak (2003), file: "Top-Secret Memo".
- ↑ Resident Evil 2 (1999), file: "Progress Report".
- ↑ Resident Evil 2 (1998), file: "P-Epsilon Gas Report".
Template:Resident Evil 2 Template:Umbrella Chronicles
| ||||||||||||||
| |||||||||||||||||