"
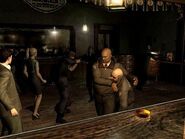
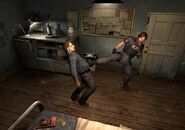
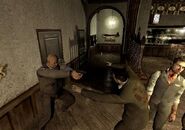
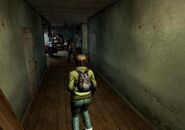
It was a typical night at J's bar. Some uninvited guests crashed the party. Our race for survival was just beginning. " |
Outbreak (発生 Hassei) is the first scenario of Resident Evil Outbreak. It begins in the bar room of J's Bar, and ends on Main Street (unless the player complete the "Escape the Zombies and Survive" ending).
Plot
While at J's Bar, a Zombie attacks Will, the bartender, mortally wounding him. Then everyone inside the building tries to evacuate. Use the stairs and eventually reach the liquor room where the forklift is needed to continue. After going to the roof and jumping to the other building, you use the elevator to escape. After having exited the bar, you will meet up with the R.P.D. police. You will need to make a barricade out of the police cars and prevent the zombies/scissor tails from coming closer. After managing to open a door to escape, the officer will get killed, and with his Lighter, you ignite the leaked gasoline which eventually blows up an entire truck. Using the sewers, you get in front of the Apple Inn. You ride an armored van and when you reach the bridge to Main Street, and you must make a choice to either backtrack to the armored van and talk to the police officer, or fight the zombies and combine both parts of the detonator to make an explosion on the main street, killing every zombie in the process, except your character, partners, and Harry. The latter is the "true" ending of the scenario.
Transcript
Opening cutscenes
Mid-game
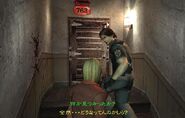
Police officer: 住民のみなさん! この区画は暴動のためあと数分で封鎖されます! 残っている人は、急いでこの通りまで出てきてください! 時間に間に合わなかった場合は… 安全の保証はできません!
Ending cutscenes
Walkthrough
J's Bar
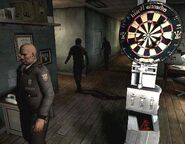
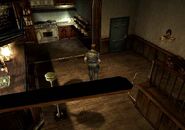
Aside from Yoko, who can be found in the Women's Bathroom, each protagonist will begin the scenario in the bar. As the player, your initial objective is to obtain the Staff Room Key to unlock the Staff Room door at the back of the bar, which is located behind the countertop (Easy/Normal) or on Will's cannibalized corpse once the zombies have broken the door (Hard/Very Hard). To further delay the forced entry of your undead assailants, you can create a temporary barricade in front of the entrance by pushing the two barrels located near the windows. You are also given the option of carrying the mortally wounded Bob through the Staff Room door to the rooftop, the success of which will credit you with additional points, but only if Mark is alive by the time you reach the rooftop.
After getting the key and unlocking the door, proceed upstairs. A zombie will break the window, but simply ignore it. While in the Staff Room, you will find a Nail Gun that can be used to barricade the open door, not allowing zombies to enter for a short amount of time, which credits you with additional points, and more points are awarded if Bob is with you. On easy or normal mode, the Key with Blue Tag needed to unlock the next door is under the Newspaper in the table. On hard or very hard mode, you have to enter the Owner's Room and get it in the balcony. After proceeding upstairs, you will reach the liquor room.
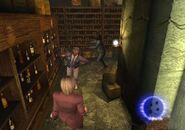
To continue your progress, you will need to use the forklift, which also needs a key. On easy or normal mode mode, the key is inside the storage room nearby. On hard or very hard mode, you will need to get an Alcohol bottle and backtrack to the Owner's Room. There, you will find a painting. Put the bottle there and a cabinet with the forklift key inside will unlock. Take the key, go back upstairs, and use the forklift. Climb the stairs and continue. If you had Bob with you, you will need to break the door downstairs, since he can't climb the ladder. Once you reach the roof, you will need to break down a metal fence. If you brought Bob with you to the rooftop and Mark is still alive, a cutscene will play showing Bob committing suicide by shooting himself to the head in order to avoid changing into a zombie (On Very Hard mode, he will instead change into a Zombie and attack Mark). Once you destroy the metal fence, you will hear a police man saying that they will leave soon. Then a timer of 3 minutes starts. You will need to jump to the other side of the building. Be careful, because you might not jump at the right time and fall. In order to not fall, simply keep pressing the Square button. Then use the elevator and proceed downstairs. Be careful, because on hard mode a female zombie will be inside the elevator.
Evacuation point
Once outside, you will need to make a barricade with the police cars. On hard mode, every zombie will be replaced by Scissor Tails. Watch out because some of them are poisonous. After some time, the police officer will start using his Shotgun to break down a wooden door. Shooting the door will help. Once it's broken, he will tell you to proceed and will notice a truck containing gasoline. After seeing the truck, he will be killed, and the player must grab his lighter (unless you already picked one from J's Bar), then use the valve to wet the canal with gasoline and then use the lighter to ignite it, killing every enemy in the process. After going down to use the sewers, the truck will blow up. Once you enter the sewers, go down the hallway and you will find a ladder that you need to climb.
Fight or flight: Main Street
Once you climb the ladder to the top, you will find yourself in front of the Apple Inn hotel. Go to another police man and gather your partners there. You will use his vehicle to continue. Unfortunately, due to a barricade, you are forced to get off the vehicle. Once you are outside, you will find weapons like Handguns, Shotguns, and a Revolver in the back of the armored vehicle (On harder modes, you will have less items). Grab them because you might need them. Once you reach the bridge, you will see three police men trying to kill the zombies with a bomb. Two of them are killed. Now you have two options. The first one, which is the quickest and easiest, is to simply go back to the armored vehicle and talk to the police officer there to end the scenario (You need to have all your current living partners with you if playing with). The other is to go to the Main Street, fix the bomb, and detonate it. The latter is the "true" ending of the scenario. Either way, you will complete the scenario.
Characters
- Will: killed by a zombie, later transformed into a zombie.
- Bob: infected with the T-Virus, but...
- In Easy, Normal and Hard modes, he kills himself with a handgun, evicting turn into a zombie.
- In Very Hard mode, he turns into a zombie before killing himself.
- Raymond Douglas: killed by a a Scissor Tail.
- Eric and Elliott: killed by zombies.
- Harry
Event checklist
|
|
Further notes
Glitches
- A glitch involving Alyssa appears in this scenario. After exiting the apartment, if the player uses her ad-libs, the game will freeze, and the player has to reset the console and start the scenario again. This glitch does not appears in the European version of the game, and does not happens while playing in Lone Wolf mode.
Easter eggs
Mistakes
References
A bottle owned by a man called Barry is stored in the bar's Liquor room, and may be a reference to S.T.A.R.S. officer Barry Burton.
Miscellaneous
- Outbreak is one of three scenarios (the others being Below Freezing Point and Flashback) in which the player has to die in order to get points for the event checklist. In order to obtain those points, a player must not jump into the water after using the Lighter in Slope Along the Canal. The resulting explosion from the truck will kill the character instantly.
- Outbreak is also one of five scenarios (the others being Decisions, Decisions, Underbelly, Flashback, and "end of the road") to feature an alternate ending depending on the player's route.
- During the Raccoon City scenario in Umbrella Chronicles many areas from Outbreak scenario are shown, like J's bar and the main street. This is due that Umbrella Chronicles uses an improved version of the engine used in Outbreak.
Gallery
Sources
| ||||||||||||||||||||

